Welcome to Shenzhen Vowin Model Design CO., LTD Website!
![]()
A one-stop product development assistance platform from design to mold mass production, to become a first-class manufacturing enterprise
- E-mail: vowin@vip.163.com
- Hotline : +86-18665838950
Welcome to Shenzhen Vowin Model Design CO., LTD Website!
![]()


Case Presentation


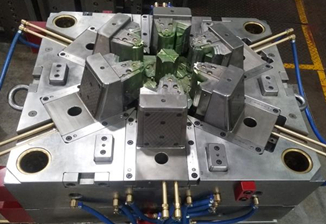
Hardware Mold Processing Flows_Hardware Mold Manufacturing Process and Steps
1、 Processing of raw materials:
1. Milling a six sided angle ruler (with a perpendicularity error of no more than 0.1/300), with the same mold material length and width dimensions, leaving a thickness of 0.2mm for grinding (0.5mm for quenched parts); Edge chamfering. 2. Grind the upper and lower surfaces, leaving 0.3mm for quenched workpieces
2、 Machining:
1. Drill and tap each screw tooth hole, through-hole, and threading hole according to the drawing; 2. Milling various leakage holes or formed parts;
3. After heat treatment, the workpiece needs to be ground to two flat surfaces and a reference edge; 4. The tolerance of each rotating part during machining shall be in accordance with the requirements of the drawing. ☆☆ All pin holes cannot be processed first: drill through the threaded holes that require heat treatment, and the rest are assembled with matching drills and hinges
III Line cutting: Cut each formed part according to the matching requirements specified in the drawing. The guide column, guide sleeve and mold frame are tightly matched; Transition fit between punch and fixed plate; The pin and each hole are transitional fit.
4、 Assembly:
1. First, assemble the mold frame according to the diagram, ensuring that the guide column and guide sleeve are perpendicular to the mold frame and move smoothly;
2. First fix the concave mold on the mold frame, evenly place the corresponding thickness of copper foil around the concave mold according to the gap given in the drawing, then install the convex mold, test punching the paper to ensure that the burrs around are uniform, then tighten the convex and concave molds and match them with pins. If it is a composite mold, it is necessary to align the punch clearance before fixing the convex and concave molds. 3. Afterwards, install the unloading and ejection mechanism
5、 The overall processing sequence of the mold: 1. Priority is given to processing workpieces that require heat treatment. 2. Processing follows Workpieces that require wire cutting
3. Then process the mold frame components, namely the upper bracket and base. 4. Afterwards, process other components. 5. Assembly and trial mold library from. wkwm5fdbd5f9 {display: none; font size: 12px;} Library from. wkwm5fdbd5f9 {display: none; font size: 12px;}
The manufacturing process of metal stamping parts:
1. Material preparation: We first need to select metal stamping mold steel materials based on the product being produced, such as mold handle, stripping plate, lower template, upper cover plate and upper clamp, pad and bottom plate, etc.
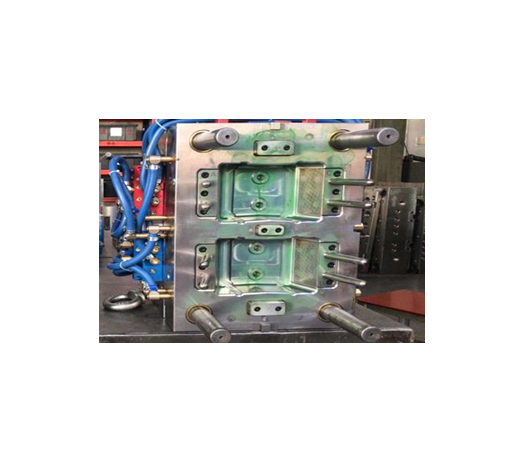
2. Rough machining: We use milling machines to machine flat and side surfaces. General machining requires the use of clamping plates, stripping plates, lower templates and pads, bottom plates, upper cover plates, and top plates.
3. Next is fine machining: Fine machining is carried out after rough machining, which involves grinding the flat surface and corners with a grinder to form right angles. Fine machining refers to grinding the flat surface of the clamp plate, stripper plate, lower template, and cushion plate, then forming right angles, and finally grinding the flat surface of the bottom plate and upper cover plate.
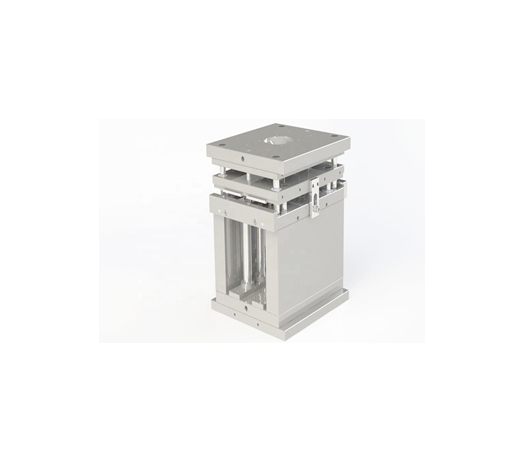
4. Marking: According to the mold making drawing, place the ground and right angled mold plate on the marking table, use a marking height ruler to mark the line, and then mark, drill, and tap the marked mold plate.
5. Trial mold: Install the assembled mold on the stamping machine for debugging. After debugging, proceed with stamping and measure the punched workpiece to confirm whether it meets the requirements of the product.

Copyright © 2023 Shenzhen Vowin Model Design Co., Ltd. All Rights ReservedGuangdong ICP No. 2023004751

 Consulting
 +86-18665838950


